Reviewed by: Britta Plug
You may have read about gua sha as a “beauty trend” online or seen someone lovingly stroking their face with a stone on your Instagram feed. True, it is trendy today but gua sha is anything but! Its roots are in traditional Chinese medicine and the technique has been used by families as folk medicine, healers, and acupuncturists for thousands of years as a healing modality to treat various dis-ease in the body. In this article, we’ll be focusing on what constitutes good technique for facial and body gua sha, as well as the foundational tutorials we recommend for each.
What is gua sha exactly?
Gua sha is a technique from the realm of Traditional Chinese Medicine (TCM), it's a practice that entails scraping a jade or stone tool across the skin of the body to increase circulation and blood flow to that area. Repeated strokes and moderate to firm pressure often creates petechiae — small red dots and bruising on the skin. Gua sha can be used to treat a myriad of ailments, from fever to chronic pain to respiratory congestion. It moves heat and clears stagnation from the tissues, and is also beneficial for beauty even though it’s not well documented in traditional texts.
Read more: What’s the difference between body gua sha and facial gua sha?
What is facial gua sha?
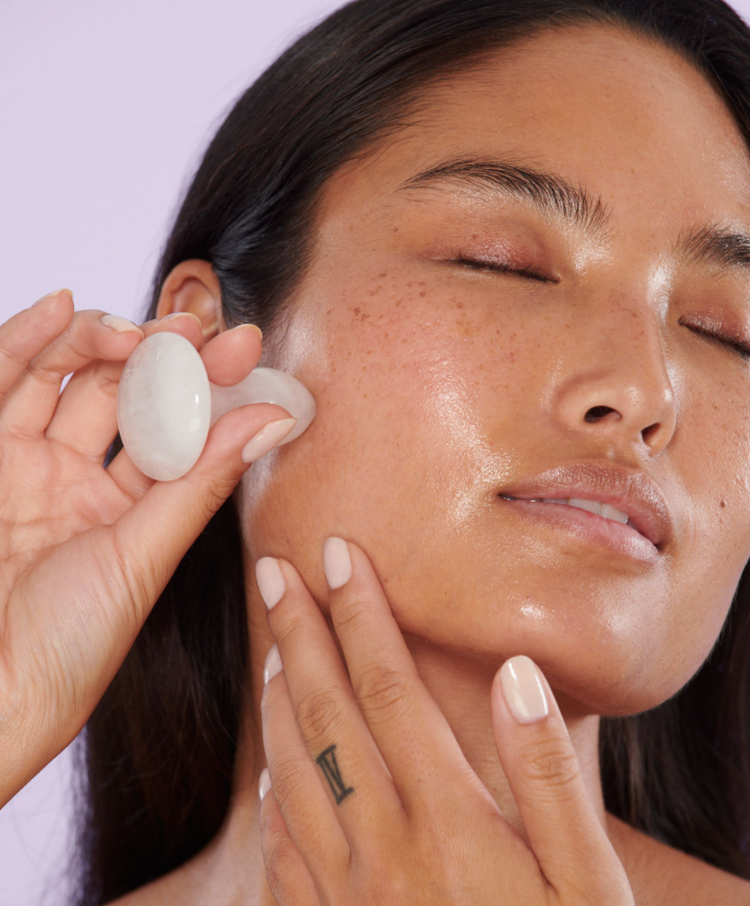
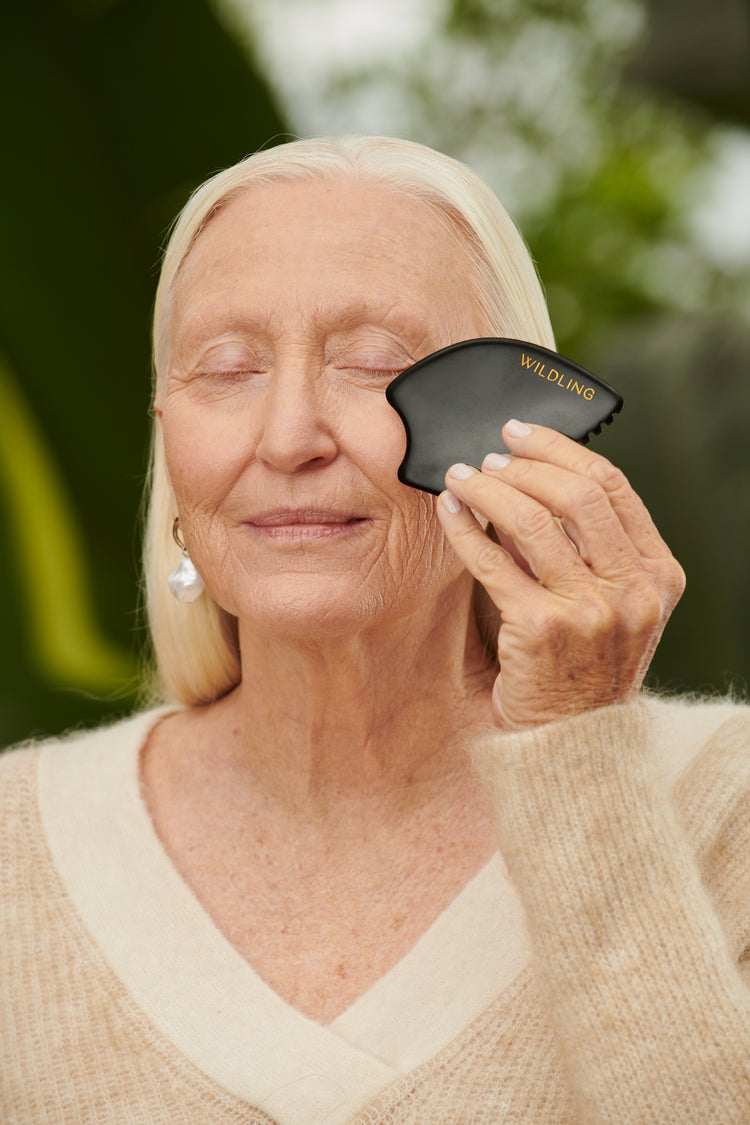
Facial gua sha uses the same principles as body gua sha, but requires a featherlight touch to sculpt the contours of the face, drain excess puffiness, and bring a youthful glow to the skin. One of the great mysteries of gua sha is the origins of the facial techniques we use today. It’s commonly believed that acupuncturists noticed the lifting qualities of acupuncture, acupressure, and gentle gua sha on the face accidentally, but no one knows for sure.
If you want to figure out what the right tool is for you, try our one minute quiz!
The Best Facial Gua Sha Tutorial: The Empress Ritual
We call our foundational facial gua sha tutorial the Empress Ritual. The Empress suite of products was named after the female principal of the Yellow Emperor in The Yellow Emperor’s Classic of Medicine, which is known as one of the most important texts guiding Traditional Chinese Medicine.
[can we embed this video: https://www.youtube.com/watch?v=1ucsGl8WxQc&t=2s]
- Prepare. Spritz your favorite hydrosol or alcohol-free toner on your skin. Follow with your favorite face oil by rubbing a generous amount between your palms and pressing it into your skin. Be sure to add oil to the back, sides, and front of your neck for some slip.
- Back of the neck. Open the back of the neck by using the U-edge of the tool (pointed downwards) by starting between your shoulder blades and pulling it up toward the back of your head. The back of the neck can take a medium to firm pressure. Hold the back of your head with the opposite hand. You’ll do 3 - 5 strokes in each area.
- Lateral back of the neck. Using the comb edge (facing down), stroke from the trap muscles and work up the side of the spine and into the hairline. Repeat on the other side.
- Front sides of the neck: From the collarbone to the jaw bone, use the comb edge (facing down) to stroke upward using a feather light pressure. Anchor the skin with the opposite hand, below the collarbone. Repeat for the other side.
- Front of the neck: Use the U-edge to move up the throat with a featherlight touch, anchoring the skin at the clavicle with the opposite hand and moving under the chin with the stone.
- Jawline: Now that the neck is open, it’s time to start on your face. Using the U-edge of the stone while holding it at a 45-degree angle against the skin, pull it toward the bottom of the ear to contour the jawbone. Anchor the skin with your opposite hand at the chin.
- Cheek bone: Continue with the U-edge along the cheekbone, moving from the base of the cheekbone up and out to the hairline, with the bottom of the U-edge meeting the top of the ear, anchoring the skin with the opposite hand on the side of your nose.
- Brow bone: Continue with the U-edge along brow bone, moving directly over the eyebrow and pulling slightly up and out to the hairline, anchoring the skin with the opposite hand between the brows.
- Lifting stroke: Using the comb edge at a 45-degree angle, gather the skin starting at the jawbone, slowly lift over the cheekbone, and finish the lift by going over the temple and into the hairline. No anchor is needed with a lifting stroke.
- Forehead lifting strokes: Continue lifting the temple, center of the eyebrow, and between the brows. Each of these areas still gets 3 - 5 strokes.
- Now do the other side. Repeat steps 6 - 10 on the other side of the face to even things out.
- Optional draining. Repeat steps 2 - 5 with downward strokes to finish — this will depuff and drain your face.
The Best Facial Gua Sha Tips
Our founders have performed thousands of hours of gua sha facials on clients, and they’ve learned a thing or two in the process. Below, we’re sharing the tips and tricks that will optimize your gua sha session so you’re getting the most out of your resources, time, and energy.
- Use featherlight pressure. It’s important to remember that harder does not equal better when it comes to facial gua sha — a light touch is what the lymph likes! Be especially delicate and careful around the eyes.
- Apply oil generously. The tool should slip and slide without any friction — this is paramount to getting the best results possible.
- Anchor the skin. Except for lifting, most strokes require that you anchor the skin with your opposite hand. Without the anchor, you’re less likely to get the results you desire. These little details make all the difference!
- Leave moles, wounds, and breakouts alone. Don’t gua sha over any moles, open wounds, or active breakouts. This could lead to further lesions or worse, infection. It’s best to leave them alone! Avoid more common gua sha mistakes like this one by reading our article!
- Hold the stone at a 45-degree angle. You have no idea how much it pains us to see a stone that is being held perpendicular to (at a 90-degree angle) the skin. While it’s probably not going to harm you, gua sha isn’t going to be as efficient this way! Be sure to hold the stone at a 45-degree acute angle, so it’s rather close to the skin. With more surface area of the stone on your skin, each stroke is accomplishing more.
- Do at least 3 strokes in each area. For the Empress Ritual, we recommend doing 3 - 5 strokes in each area, but no more than 10. Other rituals will specify the number of strokes they require, but 3 - 5 is generally a good rule to follow.
- Wiggle wiggle. For a little extra lymph action, you can wiggle at the end of each stroke. This activates the lymph nodes. If you’re feeling sore or achy, you can skip this.
- Go slowly. When it comes to facial gua sha, the slower, the better. Our Empress Ritual was designed to be a grounding and relaxing ritual that helps melt away the stress of the day. Anti-aging effects are just the cherry on top.
- Remember to take deep breaths with each stroke. Once you have the ritual memorized, it’s nice to close your eyes and focus on the sensations, taking deep breaths with each stroke.
- Cold stone! Sometimes it feels quite lovely to start with a stone that’s been chilled in the fridge (not the freezer — we worry about stones contracting and breaking) for extra de-puffing and sculpting effects.
Want more free tutorials, like this one, which will melt your jaw tension away? Sign up for an account with us and get access to our library of instructional videos.
The Best Facial Gua Sha Tools + Products
While you can do facial gua sha with any old flat stone, some out there are better than others! Ours was designed by our co-founders who all have direct experience studying Traditional Chinese Medicine, lymphatic drainage, herbalism, and more, so it’s optimized for results.
Best Facial Gua Sha Stone: Empress Stone
The Empress Stone has four different edges, three points, and a thickness that’s optimal for facial gua sha. It’s crafted from Bian stone, which is an amalgam of 40+ minerals that are believed to have healing properties for the skin and the body.
[insert the photo of the stone labeling the edges?]
U-Edge: Perfectly hugs the angles of the jaw, cheekbone, brow bone, and the back of the neck over the spine.
Comb Edge: Moves energy and invigorates the flat surfaces of the face to stimulate flow.
Short Edge: The perfect flat surface to sculpt under the eye and around the sinuses.
Pointed Tip: Tension melting tip for acupressure in the areas of the face that store tension.
Long Edge: Ideal surface for long strokes on the side and front of the neck, and underneath the cheekbones.
Best Facial Gua Sha Oil: Empress Oil
The best oil for gua sha is the Empress Oil, in our humble opinion. Made from wild buds of the Balm of Gilead tree and a Resin Nutrient Complex we developed from tree nectars, it is an oil that is helpful for all skin types (including sensitive skin, as it’s essential oil free) and designed to complement gua sha. It’s also infused with sunstone, which is said to have confidence-boosting properties and we love us some extra confidence!
The Best Body Gua Sha Tutorial
Now that we’ve outlined the basics of facial gua sha, we’re moving onto the body. Body gua sha is quite different from facial gua sha. It allows more pressure and serves a few different purposes. With body gua sha, we’re not trying to eliminate wrinkles — the primary goal is to alleviate tension and pain by restoring balance in the body’s connective tissues while activating the lymphatic system throughout the entire body. You’ll also notice a more sculpted physique, with less cellulite and smoother skin.
[can we embed this video: https://www.youtube.com/watch?v=f4SVFiGwrQg]
The Aura Ritual
Best results come when you do the full ritual 2 to 3 times a week.
- Dry Brushing: Start by brushing the entire body with a stiff bristled brush on oil-free, dry skin. Our Aura Sweeper is handmade from agave fibers, which have the optimal “bend” for dry brushing. Brush in short strokes, firmly, toward the heart. This is best done before a shower or bath, but no stress if you’re going to skip it.
- Start with tops of the feet, and work your way up the leg, the backs of the knees, the inner thighs, and butt, brushing upward.
- Then go up your arms, under your elbows, and over and around your armpits brushing toward the heart.
- Make large, circular, counter-clockwise strokes around your abdomen, which helps to stimulate digestion.
- Sweep upwards from the lower back, and down the neck
- Optional shower. If you’re going to incorporate a shower into your ritual, now is the time! But it’s not necessary.
- Prepare. After scuffing up the skin with a dry brush, it’s important to apply a moisturizing body serum. The Aura Activator is formulated with French seaweed which works to plump and hydrate the skin. Freshly exfoliated skin is primed to absorb the product. Then apply body oil like the Aura Oil in the areas you plan on doing gua sha. This step is extremely important, don’t miss the oil!
- Legs. It’s time to grab your gua sha stone. You can use the Empress Stone on the body if you have one, but we developed a larger one, the Aura Stone, to use with the specific contours of the body in mind. You’ll use 3 - 5 strokes in each area. Move up the back of the legs, behind the knees, and the upper thighs. Use the U-edge or the flat edge.
- Arms. Using the U-edge or flat edge, stroke upward from your forearms and wrists, up towards the shoulder.
- Breasts. For breast health, gently gua sha from the center of the breast outward in every direction.
- Abdomen. Use large, circular, counter-clockwise strokes to gua sha over the belly.
- Lower back. Stroke upwards from the lower back toward the center of the back.
- Shoulders. Stroke downwards on the traps and from the shoulders.
Read more: All of the benefits of full body gua sha, explained.
Best Body Gua Sha Tips: Things to Remember
- Dry brush beforehand. We believe dry brushing beforehand primes the skin and body to receive nutrients and benefits from the products, and better prepares it for gua sha.
- Work from the extremities toward the center of the body. Starting with the feet, arms, and then working into the torso.
- Do 3 - 5 strokes, or up to 30 for some techniques. If you’re trying to get into the fascia and address pain, do up to 30 strokes (although the more strokes you do, the more likely you are to leave a mark or bruise).
- Use firm pressure. Your body gua sha should feel like a deep tissue massage. Of course, the ritual should always feel good on the body, so stop if you’re in pain and consult a practitioner for further guidance.
- Bruising isn’t “bad” when it’s from body gua sha. With firmer pressure and more repetitive strokes, bruising can occur. Here’s why bruising isn’t bad, including information on what to do if you would rather avoid it.
- Avoid gua sha over moles, scars, cysts, rashes, cuts, or any other lesions. Gua sha around the area instead.
The Best Body Gua Sha Tools + Products
Below is a quick and easy reference to essential tools for body gua sha, but to learn more check out our complete guide to the Aura Collection.
Best Body Gua Sha Stone: The Aura Stone
This is the most crucial part of the Aura Ritual. Our gua sha stone for the body has five features that are built to help reduce the appearance of cellulite and help repattern our connective tissue, the fascia, to reduce pain and stagnation in the body.
[insert photo here]
Wavy Edge: Delivers maximum fascial smoothing and lymphatic drainage. Use to perform gua sha over larger flat surfaces of the body (thighs, abdomen, sides of the body).
U-Edge: Contours and sculpts smaller curved areas of the body (arms, lower legs, shoulders).
Pointed Tip: Breaks up tissue and helps to smooth fascia in dimpled areas. Use the pointed tip to massage back and forth over tight muscles or dimpled skin (dimpling in the skin can indicate an area where the fascia is stuck to the muscle).
Comb Angle: Use the Comb Angle with cross friction strokes. Provides surface repair by stimulating collagen to nourish stretch marks and dull skin.
Smooth Edge: Smooths fascia and deeply massages tissue.
Best Gua Sha Oil: Aura Oil
The Aura Oil is formulated to enhance your body gua sha practice. We’ve used ingredients that help to increase circulation, smooth out adhesions and rippled skin, and help facilitate healing. Wild rose pepper, organic helichrysum, and wild mastic restore the skin's natural repair processes, yielding younger-looking skin. It’s safe for all skin types, including sensitive skin, as it is essential oil free.
You Do Need Oil for Gua Sha: Here’s Why
The skin care you use while doing gua sha (both for face and body) is just as important as the techniques themselves. We’ve formulated ours to work in concert with the tools and the results. For example, the ingredients in our Empress Oil help to boost circulation in the skin and move the lymph. (See our article to make sure you’re applying face oil the right way.) Our Aura Oil body oil helps to keep skin supple and can reduce the appearance of cellulite. But most importantly, using an oil gives the stone a little slip — it’s recommended when doing gua sha on the body or the face.
Read More: The ultimate checklist you need when buying natural skin care products.
Facial gua sha and body gua sha have immediate results, but over time, both have long term benefits like release of held facial expressions and reduction in appearance of cellulite. If you’re interested in making gua sha a daily habit, join our free 21-day challenge. You’ll learn new techniques, pro tips, and join the community where people share their own before and after photos, ask questions, and swap knowledge.